This post may contain affiliate links, from which we earn an income. Click here to read our affiliate policy.
Your guide to hiking to Trolltunga with practical tips & stats
Trolltunga is one of Norway’s most iconic hikes. In an area of wild and dramatic outstanding natural beauty, hiking Trolltunga has to be on your Norway bucket list.
But what is the famous Trolltunga hike really like? How hard is it and how fit must you be to attempt the 20km route? And what happens once you get to the Troll’s Tongue?
In our Trolltunga hike guide, we share all this information plus practical advice about preparing for one of Norway’s best hikes, where to stay and park, getting to the trailhead, and top Trolltunga tips to help you successfully complete this epic hike.
Intro to Trolltunga Norway
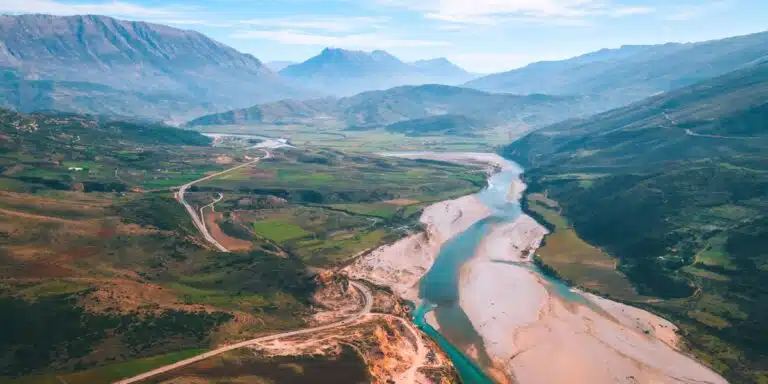
Trolltunga, at 1,100 meters above sea level is found in the high mountains of Folgefonna National Park in the stunning Hardangerfjord region, one of the most beautiful places in Norway and also home to the Folgefonna glacier and the Vøringsfossen waterfall.
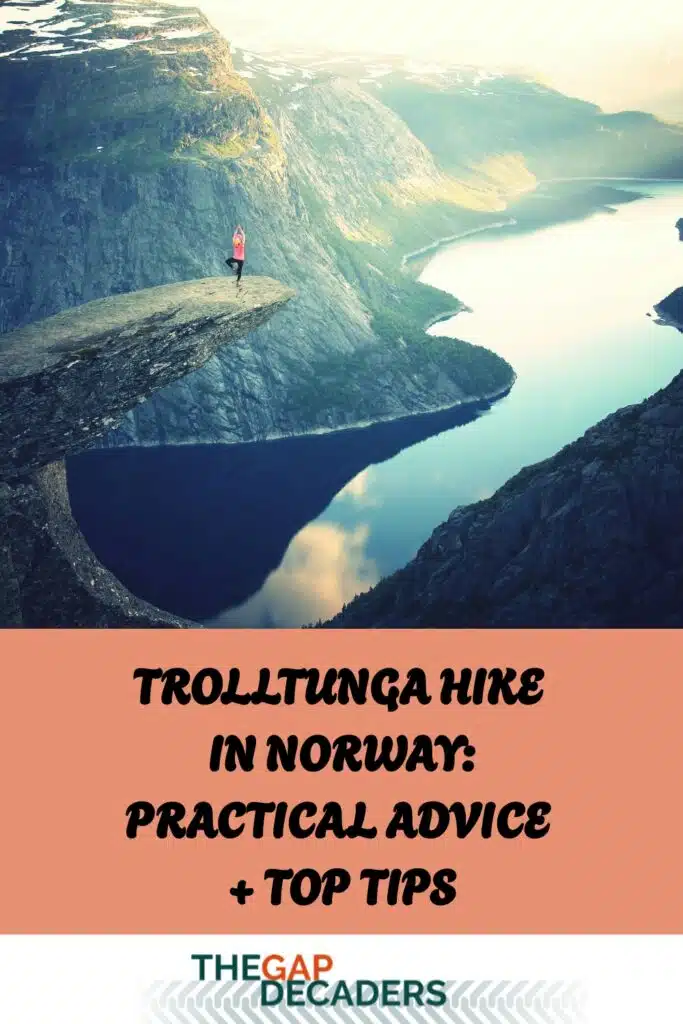
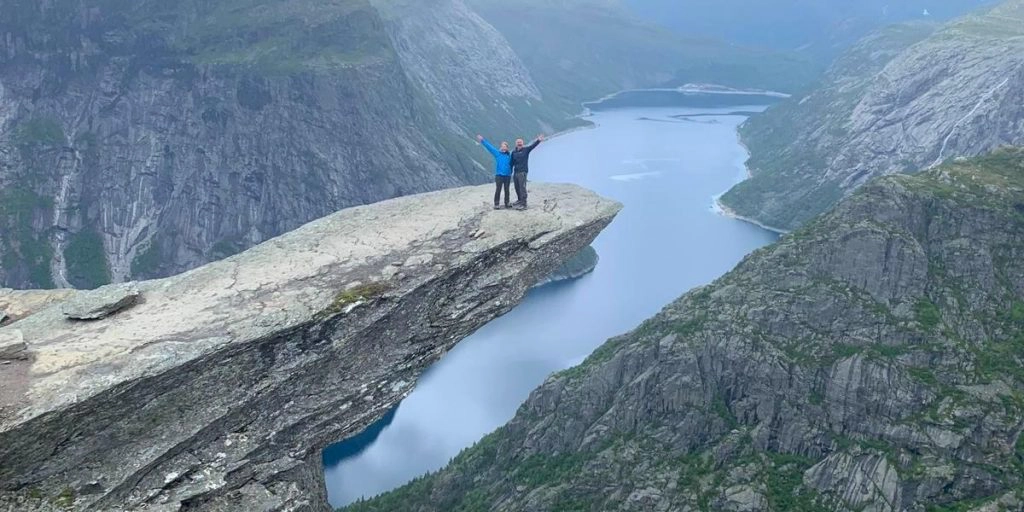
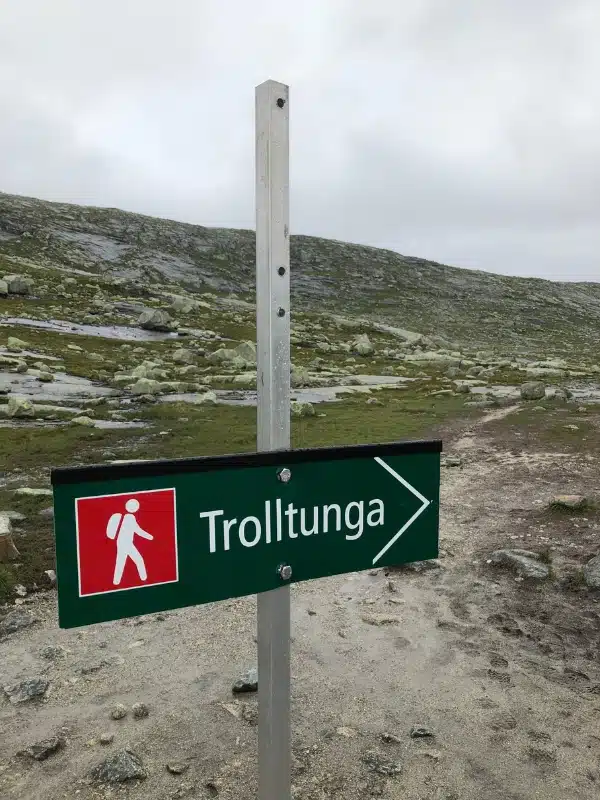
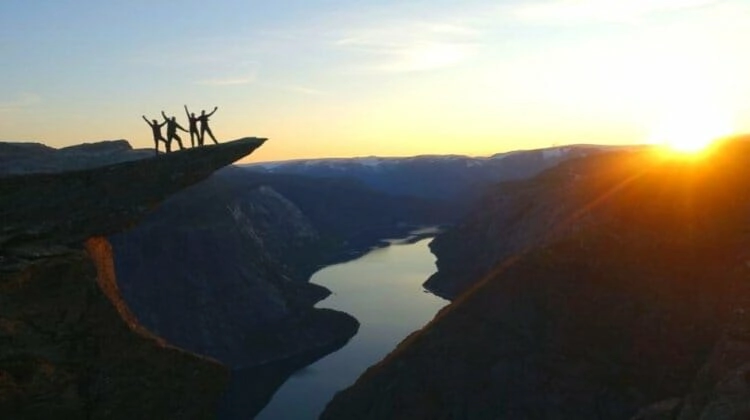
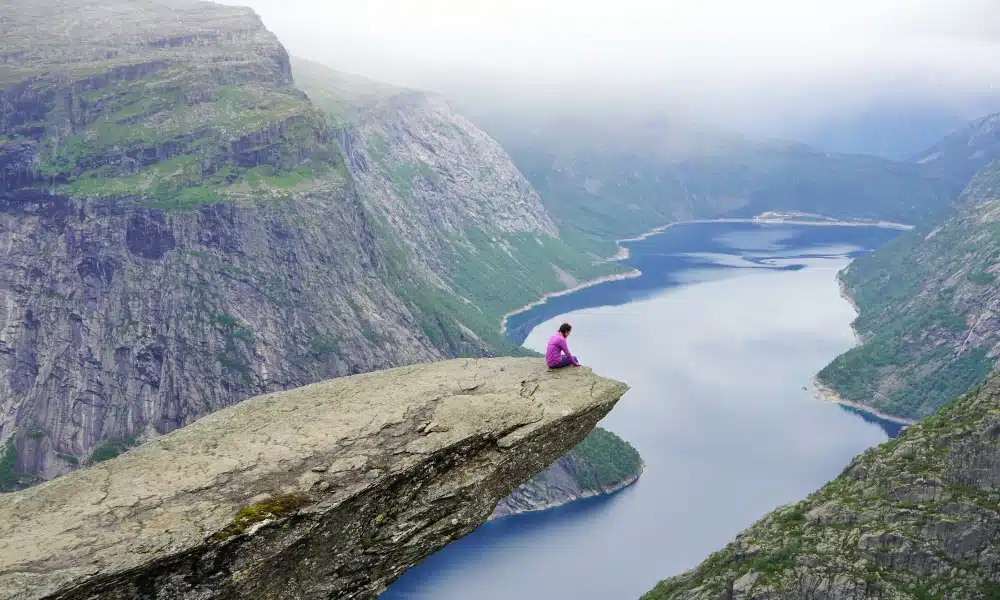
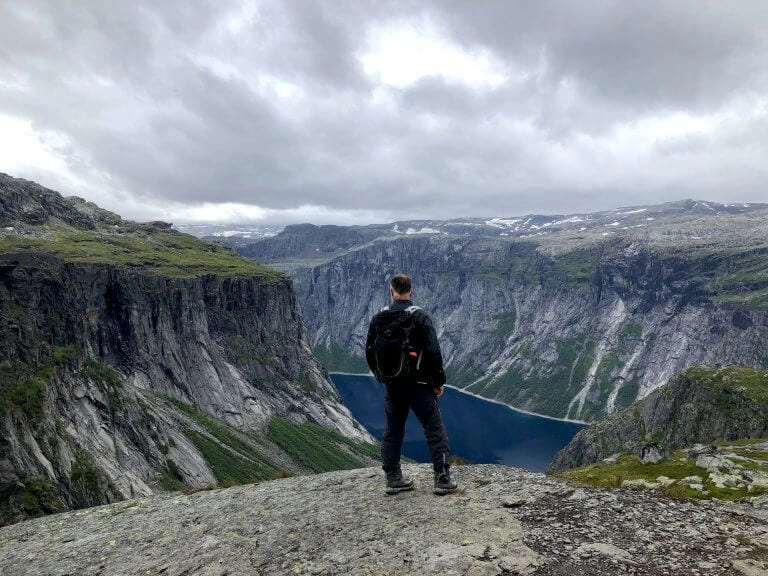
Trolltunga, meaning Troll Tongue, is the most spectacular rock formation, long and not very thick, that juts horizontally out from the mountain, resembling a sticking-out tongue. The tongue stretches out by around 15 meters and is 700m above the lake below.
Thousands of people visit the adventure tourism site of Trolltunga every year, to grab their once in a lifetime experience on the famous jutting rock. But make no mistake; this is an arduous and challenging hike across the bleak and inhospitable terrain of the ice age Hardangervidda plateau, in a country known for its changeable weather conditions.
Preparation is key for this day hike through high-mountain terrain. Having the correct equipment and taking the right provisions on the day, understanding the terrain and weather, and the logistics of where to stay, how to park, and getting to the start point of the hike are all key.
Of Norway’s most famous hikes, Trolltunga is the hiker’s choice – longer and more challenging than either Preikestolen (Pulpit Rock) or Kjeragbolten.
Complete Trolltunga, one of Norway’s most epic hikes through dramatic landscapes and natural surroundings, and you’ll be part of a pretty small club, although it may feel like lots of people post that shot on Instagram!
Is this your first time visiting Norway? Get all the information you need in our Norway Travel Guide, including what to pack, the best time of year to go, getting there and practical tips to help you have the best trip!
When to Hike Trolltunga
1st June to 30th September
1st October to 31st May
Trolltunga Logistics
The logistics of getting to the start point for the Trolltunga trek can be a bit confusing as there are so many options …or maybe we’re just a bit dim! We did work it out though and below we share all the options, prices, and contact details for your day trip to Trolltunga.
The small town of Odda is closest to the starting point of the hike. With lots of accommodation options and specific Trolltunga transport, it’s the perfect place for the night before and after your hike.
Getting to Odda
Driving
If you’re staying in Bergen (also the closest airport) and want to hike Trolltunga in a day, you’ll need to leave the city very, very early.
Whether you take the ferry from Tørvikbygd across Hardangerfjord or drive through Norway via Skulestadmo, it will take at least four hours to drive from Bergen to Odda, before going on to one of the parking lots.
Unless you’re happy hiking in June until the sun sets at 11pm, this would be an exhausting day, and driving after such a long hike may not be advisable. Consider spending a night in Odda if you possibly can.
Trolltunga also makes a great stop on a wider road trip of Norway, especially if you’re traveling or road tripping through the western fjords from Stavanger to Flåm and beyond.
By Public Transport
From Bergen: Take the SkySS bus route 930 from Bergen to Odda, the journey takes around three hours.
From Oslo: To do the Trolltunga hike from Oslo, take the Oslo-Voss bus route 990, which will take five to six hours to get from Oslo to Odda.
From Stavanger and Preikestolen: Get the Trolltunga Preikestolen express coach service which will take around three and a half hours.
Where to Stay for the Trolltunga Hike
There are lots of great options for accommodation in and around Odda depending on your budget and how long you want to stay in the area:
Camping
If you’re traveling in Norway by motorhome or campervan, or you’re backpacking and looking for cheap self-catering accommodation, Odda Camping is a basic, well-priced option for an overnight stay.
The site is a bit of a free-for-all but has a happy vibe, clean showers (NOK20 for 5 mins), and a shared kitchen and dining room. Be aware that you cannot book this site in advance, you need to be there by 2pm for the best chance of a bed or pitch.
For campervanners, there is also Odda Bobilcamp in Odda. You’ll need to be self-contained as there are no services, just hardstanding for parking, albeit with a pretty good view across the fjord – shame about the petroleum depot though!
For backpackers and road trippers, Trolltunga Camping is five minutes outside of Odda, on the Trolltunga bus route, and offers budget rooms with shared bathrooms, cottages, and apartments.
Hotels & Self-Catering
If budget is not your prime consideration, Vikinghaug Apartments are well located in the center of Odda and offer comfortable and clean rooms, amazing fjord views, and the all-important post-Trolltunga bath.
A good middle-of-the-range option is the Trolltunga Hotel, just a mile from the center of town on Lake Sandvevatnet. Some rooms have lake and glacier views, and they provide a great pre-hike breakfast and packed lunch if required.
If you’re planning on stopping in the area a little longer, or traveling as a family, Bakkegata has one and two-bedroom self-catering apartments from which to explore the region.
How to Get to the Trolltunga Trailhead
There are two places you can start the hike, depending on how much distance and elevation you are happy to cover on foot.
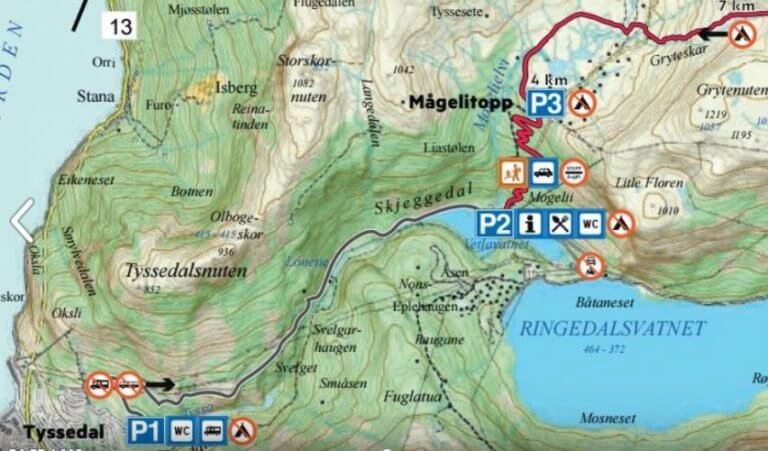
These starting points are known as P2 Skjeggedal and P3 Mågelitopp, with the latter being the actual trailhead, where you start off-road hiking.
P1 Tyssohallen
This is the site of the official Trolltunga parking in Tyssedal, 6km from the center of Odda, and well-signed. It’s an 18km shuttle bus journey to P2 Skjeggedal from here.
The car park has no services and prohibits any kind of overnight camping or parking. Get caught sleeping in a vehicle here and you’ll face a whopping NOK500 fine.
P1 Tyssohallen is the only official Trolltunga motorhome parking available as the road from P1 Tyssohallen to P2 Skjeggedal is forbidden to vehicles over 5.2 meters long.
Odda Taxi (OT) and Taxi/Bus Odda (TBO) provide a shuttle bus between 1st June and 30th September, which stops at P1 before heading up the road to P2.
The first pick-up at P1 is 6.15am and the last run back to P1 from P2 Skjeggedal at 8pm. Booking tickets online is advisable.
P2 Skjeggedal
A lot of people start the hike from P2 at Skjeggedal, where there is a large car park, services, a place to fill your water bottle, a café, and an information point.
The first part of the hike from here is a steep climb along a private road that ends at P3 Mågelitopp, with the first kilometre being the hardest up a series of stone steps. If you start and finish from P2, you’ll be covering 480 meters of elevation gain over 3.5km and completing a 27-km round-trip hike.
To get to P2 Skjeggedal, from Odda, hop on the Trolltunga shuttle buses from Odda which are operated by two companies, Odda Taxi (OT) and Taxi/Bus Odda (TBO).
Between 1st June and 30th September, both pick up from the main campsites and hotels in town, with the earliest departure being 5.50am and the last run back to town from P2 Skjeggedal at 8pm. Booking tickets online is advisable.
P3 Mågelitopp
The upper parking lot of P3 is where the main trailhead starts and if you leave from here you’ll miss the major climb from P2.
There are a limited number of parking spaces at P3 which must be booked in advance at a cost of NOK600 plus the road toll of NOK 200. The maximum vehicle height for the P3 parking lot is 2 meters and no motorcycles are allowed.
Getting there is via Mågeliveien, the ‘Trolltunga road’, built for use by locals. This single-lane road has seventeen hairpin bends and an inclination of 17%. If your vehicle is unsuitable you will be denied road access by on-site traffic attendants.
The road opens daily at 6.30am and drivers permitted to proceed will first be briefed by attendants on how to navigate a steep road and how to park.
If you miss out on a parking spot or don’t want to pay the fee, it is possible to take a shuttle bus up the steep Mågelia hillside from P2 to P3 and the start of the hike, saving 3.5km on the one-way distance and 480m on the elevation gain.
The minibus between P2 and P3 must be booked in advance. You can only book the journey up ahead of time – if you also want to take the shuttle down you can organise that at the time.
Going down costs about half the price as going up, when you show your initial ticket to the driver (don’t worry about language, everyone speaks English here).
There is usually a small wait for the shuttle late in the afternoon as everyone starts to arrive back at the trailhead after the long return hike.
Organized Trolltunga Hiking
Are you reading this and thinking it’s all a bit complicated? Do you fancy doing the hike and staying overnight to capture the most amazing sunset and sunrise images, when no one else is around?
Or do you prefer to get up there using the Trolltunga via Ferrata as part of a guided hike, or go out of season with snowshoes? Perhaps you just want someone to organize the day for you?
The best way to do all this is to book an organized trip where your tour guides will keep you safe and share local fairytales and legends as you hike.
The Trolltunga Hike
Before you head off into the raw wilds of Norway make sure you have all the info about the hike that you need, what to expect, and how to ensure you make it there and back in one piece!
Information here is based on starting at the P3 trail head. From P2, the hike to Trolltunga adds 3.5km one way and 480m of elevation elevation gain, requiring at least another two hours of hiking.
Ability
You don’t need to have any technical climbing or mountaineering knowledge for this hike. However, if you’ve never hiked before then this probably isn’t the best ‘first’ hike to pick!
You need to be in reasonably good shape, have some degree of fitness and stamina, no respiratory issues, and be able to be on the move for at least seven to eight hours, the estimated hiking time.
A determined and can-do mindset will help you keep going when you’re feeling cold and tired, especially if this is the first time you’ve hiked in this type of terrain.
Terrain
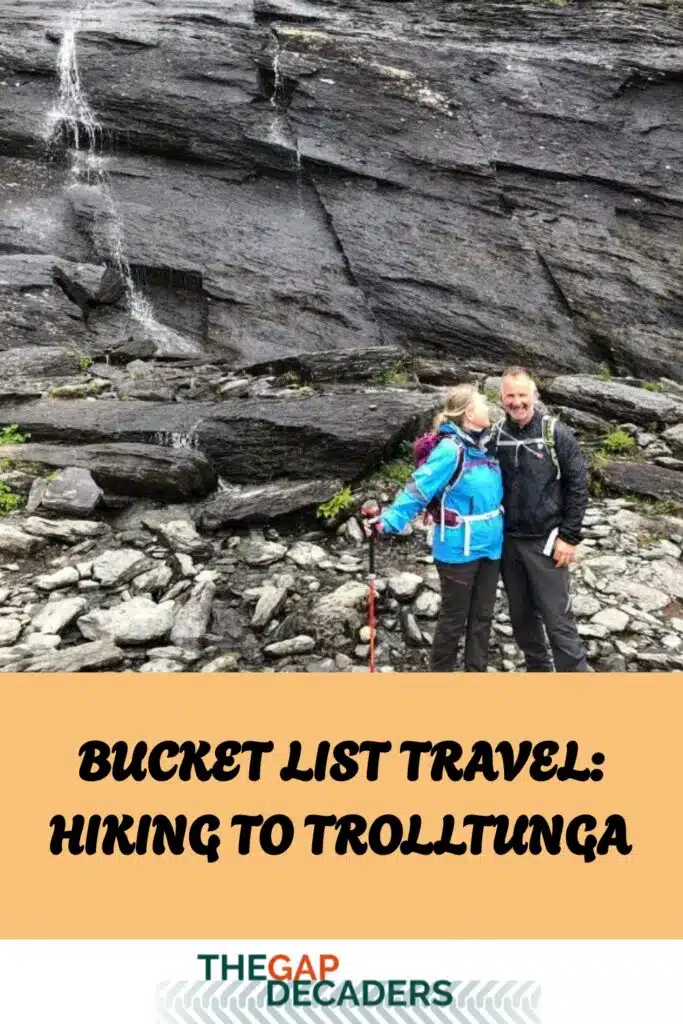
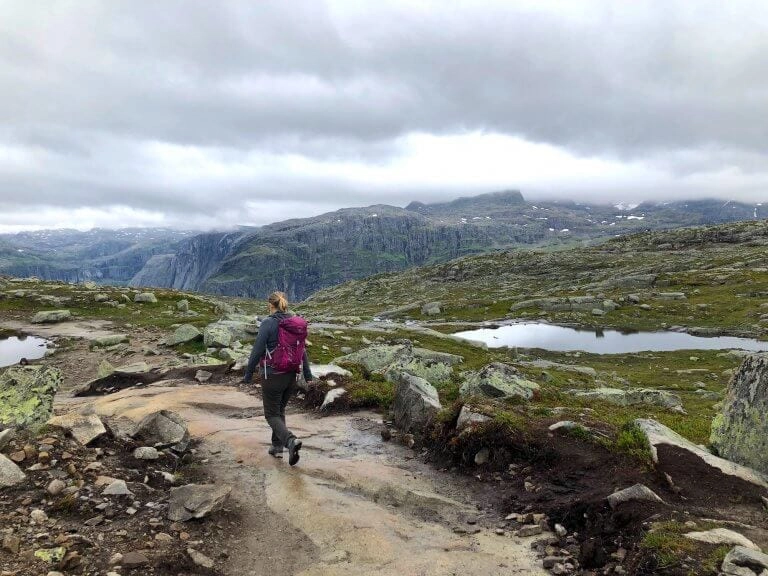
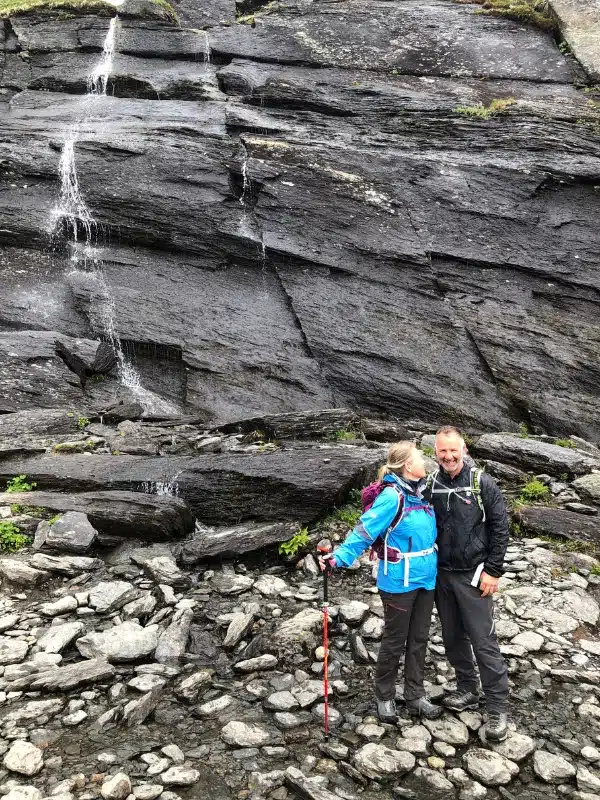
Much of the hike is along level terrain, with almost all the elevation gained in the first quarter. There are quite large stone steps to climb up at the beginning of the hike, flat and sloping smooth rock, rocky paths, and numerous streams to get through, some with stepping stones, others without.
The risks here are of slipping, particularly during the descent of the stone staircase. Being sure-footed is an advantage but if you’re not a mountain goat, the best option is to use walking poles.
Route
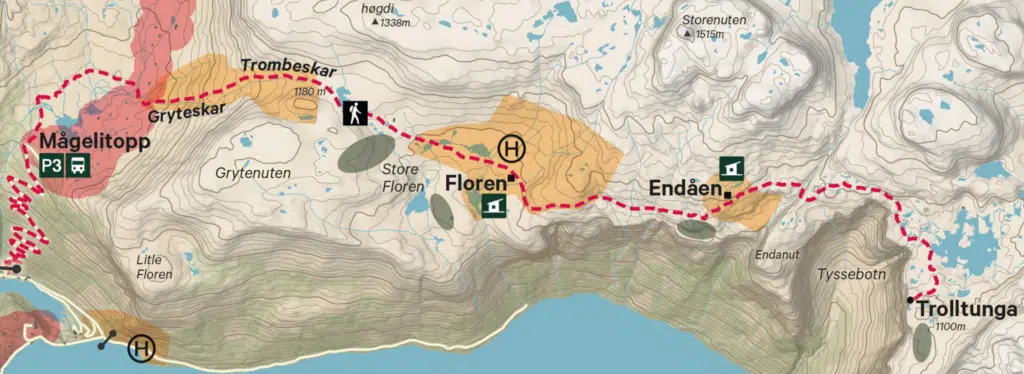
This is a linear route i.e. there and back along the same path.
In the map below you can see that the trail follows the line of Ringedalsvatnet Lake and in some places, you’re pretty close to those steep cliffs with over 700 meters of sheer drop to the water below. It’s a good idea not to get too close to the edge!
The orange areas around the route show where camping is prohibited. The oval brown areas are designated camping spots. The pink area around the start of the trail is an area where cabins are permitted.
There are two rescue cabins on the route which can provide emergency shelter during a storm. In a medical emergency call 112 and provide an accurate description of the emergency and your location.
Weather
Make sure to check the Trolltunga weather forecast before starting your hike.
There is an official Facebook page where you can check the weather and Trolltunga trail information before you set off.
Do not hike if strong winds, heavy rain, or fog are predicted unless you are an experienced hiker and have the right equipment to cope with the conditions, including an emergency shelter.
Timing
All the advice is to get an early start …as in, get up at the crack of dawn and get the first bus. This is great advice in the autumn and spring when dusk comes early and it gets dark very quickly.
In the summer months, it stays light until 11pm, so starting early is not so critical as you’ll have plenty of time.
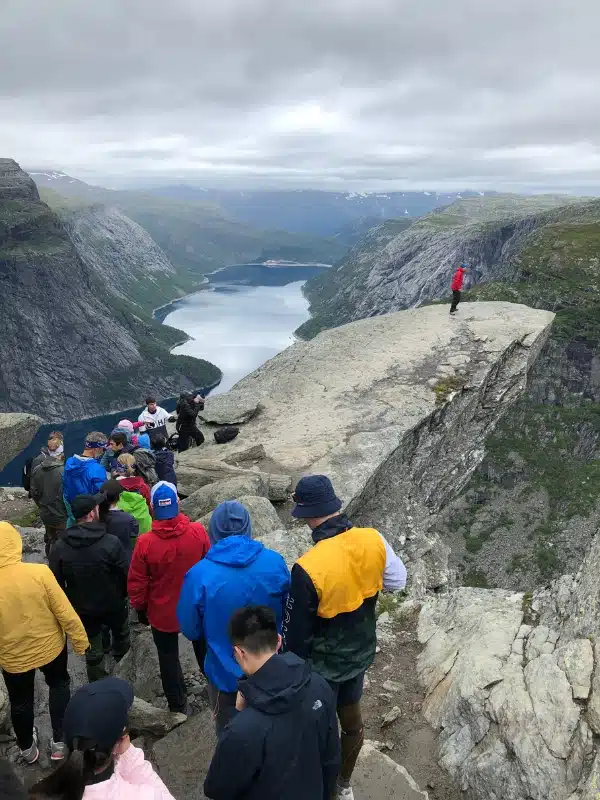
If you start a little later, you may well miss the big crowds, who generally arrive at Trolltunga around lunchtime and start to queue for their turn on the lip, sometimes the queue can be 60 to 70 people deep and the wait up to three hours long.
We suggest starting a little later and arriving at Trolltunga after lunch. You will be rewarded with a much shorter queue and a quieter hike home in good time to catch the last bus from P2 at 8pm, and back to your hotel, tent, or campervan for a much-deserved beer!
Alternatively, if you’re hiking in warmer weather and have enough time, start much later in the day and carry a tent and supplies for an overnight hike. You can camp (although you must not stray too far from the path) and enjoy Trolltunga at dusk or dawn the next day, for a mostly people-free experience.
The Tongue
Going out onto the tongue is exciting, and as you wait, you’ll see people sitting on the edge, practicing yoga and even hand-standing to try and get the perfect shot to post on social media, along with the ubiquitous adventure quote.
There is an area to the side of the tongue, where your fellow hiker(s) can capture the perfect shot. Be mindful that all around the Trolltunga cliff area there are a lot of very steep drops and some unstable rocks.
Don’t forget where you are and be distracted, you don’t want to be the second Trolltunga death on record.
Norway Travel Ideas

Equipment
Don’t underestimate having the right gear. Every year rescue operations take place on the route of this popular hike because people are poorly equipped or insufficiently prepared.
Trolltunga Do’s & Dont’s
The Trolltunga Experience
We were in two minds about whether to do this hike. We were put off by the idea of hiking for quite a few hours through the raw, probably wet, and cold mountains of Norway, to a fairly small, sticky-out bit of rock, where there would be lots and lots of other people all taking photos for Instagram.
Surely there must be lots of other spectacular hikes in Norway? What about the Preikestolen hike, the famous Pulpit Rock, or the Kjeragbolten hike for its incredible balancing boulder? Well, neither is as challenging and both are just as crowded!
In the end, we decided to go because we thought we would always regret it if we didn’t. Hiking Trolltunga was always a bucket list item! We wanted to take our turn on the tongue and have that special moment that relatively few people in the world will experience.
Was it the right decision? Absolutely.
As a hike, it was perfect and totally worth the effort. Challenging enough but achievable, the route passes through some of the most jaw-dropping and dramatic scenery we have ever seen. There was camaraderie on the trail, a common goal, and a sense of community with our fellow hikers.
In recent years, the logistics associated with Trolltunga have been commercialized as much as they can be and the costs hiked (see what I did there!) to exploit people’s social media obsession.
The Troll’s Tongue itself is inaccessible enough to prevent it from becoming a Disneyesque attraction, and I hope that it stays raw, wild, and undiminished for thousands of years to come, just as Mother Nature intended.
Are you looking for more travel inspiration? Check out these top posts…
Lac de Gaube Hike: Our Guide to the French Pyrenees’ Most Beautiful Lake
Cirque de Gavarnie: Our Guide to France’s Most Spectacular Walk

The Ultimate Dolomites Road Trip Itinerary: 7 Days in Northern Italy

Best Norway Road Trips: 4 Unmissable Itineraries for First-Time Visitors

10 Day Northern Italy Road Trip Itinerary: The Ultimate Route with Optional Extras
The Ultimate Albania Road Trip Itinerary: 7 Days With Optional Add-Ons
Love it? Pin it!