This post may contain affiliate links, from which we earn an income. Click here to read our affiliate policy.
Your motorhome toilet is one of those things you soon get comfortable talking about, especially when you’re comparing notes with fellow travellers at a campsite service point! Getting to grips with how it works, what goes into it and where to empty it makes everyday life on the road much easier.
We’ve used cassette toilets in both our motorhomes, had a SOG ventilation system fitted and switched to a Separett Tiny separating toilet when we moved into our overland truck. Each setup has its advantages, and the right choice depends on your vehicle, how you travel and how often you can reach a disposal point.
In this guide, we share our experience alongside practical advice on toilet types, emptying, cleaning and managing smells, helping you choose a suitable setup and look after the loo you already have.
Motorhome Toilets Key Facts
In this guide: The Gap Decaders explain motorhome toilet types, everyday use, cleaning and waste disposal.
Key practical facts: Toilet capacity, water use and access to suitable disposal points all affect how long you can stay off-grid.
Best for: Motorhome and campervan owners getting to know their toilet or considering a different setup.
Our experience: The Gap Decaders have travelled full-time since 2018, using cassette toilets, SOG ventilation and a Separett Tiny separating toilet.
Enjoy The Gap Decaders? Add us as a preferred source on Google.
Motorhome Toilet Types
Most UK and European motorhomes come with a cassette toilet, while smaller campervans often have a portable loo that tucks away beneath a seat or inside a cupboard. Separating toilets are another option, particularly for conversions and vehicles used for longer trips off-grid, while larger motorhomes and American RVs may have a fixed black waste tank.
The main differences are how each system collects waste, how much water and electricity it uses, and what you need to do when it’s time to empty it.
Cassette Toilets
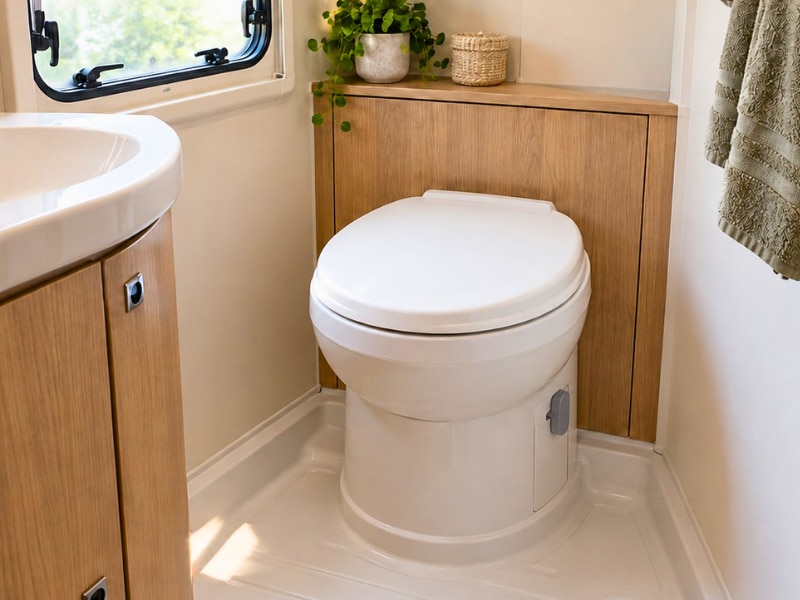
If you have a UK or European-built motorhome or caravan, there’s a good chance it has a Thetford or Dometic cassette toilet. These permanently fitted toilets have a removable waste tank, known as a cassette, which you usually access through a service hatch on the outside of the vehicle.
Inside, the toilet looks much like a compact household loo, although the bowl is often plastic rather than ceramic. Many models have a swivelling bowl to make better use of a small bathroom, and the flush draws water from either the motorhome’s fresh water supply or a separate flush-water tank.
A sliding blade separates the bowl from the cassette below. You open it using a lever so waste can drop into the tank, then close it after use. When the cassette needs emptying, you close the blade, release the tank through the external hatch and carry or wheel it to a designated chemical toilet disposal point.
Cassette toilets are convenient for touring because disposal facilities are widely available at campsites, motorhome aires and service areas. Their main limitation is capacity: how often you need to empty yours depends on the tank size, the number of people using it and how much flush water and toilet paper goes in.
If you’ve bought a used motorhome, a compatible fresh-up kit can give you a replacement cassette and toilet seat without changing the whole toilet. We’ve done this with our previous motorhomes, although you’ll need to check the exact toilet model before ordering.
What Is a SOG Toilet System?
SOG is a ventilation system fitted to a compatible cassette toilet. A small electric fan draws air from the cassette, helping prevent smells from entering the bathroom when the blade is open and allowing you to use the toilet without chemical additives.
Depending on the installation, the extracted air vents through the service door, floor or roof, with a filter where required by the system. The cassette still collects the same waste and needs emptying at a suitable disposal point, so fitting SOG doesn’t increase its capacity.
We had a SOG system in our motorhome and found it one of our most useful upgrades. If you’re considering one, check compatibility with your toilet, where the outlet will sit in relation to windows and your awning, and the filter maintenance required for that particular installation.
RELATED POST: Motorhome Tips for Beginners: Essential Know How for Motorhome Life
Separating and Composting Toilets
Often sold as composting toilets, many waterless motorhome loos are more accurately described as separating toilets. They divert urine into a bottle or holding tank and collect solids in a separate container, reducing the amount of moisture in the solid waste.
The distinction matters because collecting waste separately doesn’t turn it into finished compost. The contents still need appropriate handling and disposal, and any composting requires a separate, properly managed process.
Designs vary considerably. Some toilets collect solids in a lined container, while others use a material such as coconut coir and have an agitator to mix the contents. Models with an extraction fan need a power supply and ventilation ducting, so check the installation requirements before deciding what will fit your bathroom.
We switched to a Separett Tiny separating toilet when we moved into our overland truck, having previously used cassette toilets in our motorhomes. For the way we travel, often staying in remote places, the lack of flush water and our experience of managing smells have made it a worthwhile change.
Our Tiny collects solids in a lined container and uses a ventilation fan; it doesn’t have a mixing chamber or need handfuls of coir added after every use. Other designs work differently, so it’s important to follow the instructions for your particular model.
Separating toilets can extend the time between solid-waste empties, but the urine container may need attention much more frequently. You also need room to remove the containers, access to suitable disposal facilities and, for fan-assisted models, enough power to maintain ventilation as instructed.
Before choosing one, think through how you’ll manage both waste streams throughout your trip. Don’t assume urine can be poured outdoors or bagged solids can go into any public bin or compost bin; use disposal arrangements permitted by the local authority or site operator.
Gravity Flush Toilets
Gravity flush toilets are usually found in larger motorhomes and American RVs, where waste drops directly from the toilet into a fixed black waste tank underneath. Many have a foot pedal that controls the water supply and opens the valve at the bottom of the bowl.
Unlike a cassette toilet, there’s no removable container to carry to an emptying point. Instead, you connect a sewer hose to the vehicle’s waste outlet and drain the tank at a service point designed to accept black waste from a fixed tank.
The larger tank can give you longer between empties, although you’ll need to plan around suitable disposal facilities, which can be harder to find than cassette emptying points when touring the UK and Europe. Grey water is commonly held in a separate tank, but layouts vary, so check how the particular vehicle is configured.
A small amount of water retained in the bowl helps seal off smells from the tank. Keeping the bowl seal clean and following the manufacturer’s guidance on water use, tank treatments and emptying will help the system work properly.
RELATED POST: An Easy Guide to Motorhome Water Systems

Complete Guide for Motorhome Beginners
New to motorhoming? We’ve put everything we wish we’d known into one practical guide.
From getting to grips with your motorhome to touring Europe and everyday life on the road, it’s packed with practical advice to help you get started with confidence.
Portable Toilets
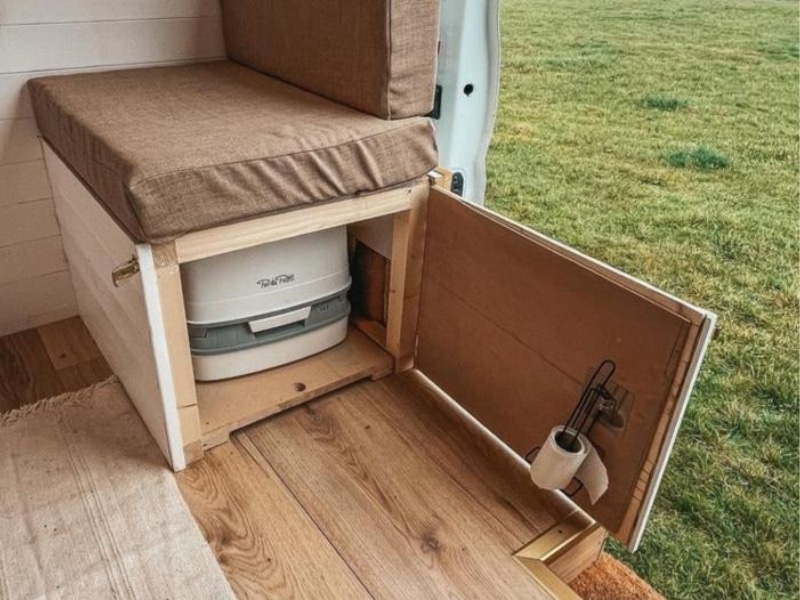
A portable toilet is a practical option for smaller campervans, especially if you don’t have a dedicated bathroom or want a loo that can be stored beneath a seat or inside a cupboard. Unlike a fitted cassette toilet, it doesn’t need an external access hatch or a permanent connection to your vehicle’s water supply.
The familiar Thetford Porta Potti and similar designs have two sections: an upper section containing the bowl and flush-water reservoir, and a lower waste tank. For emptying, you separate the two and carry the sealed lower tank to a designated toilet disposal point.
Depending on the model, flushing is operated by a manual pump or an electric pump. Check the seat height, waste tank capacity and overall dimensions before buying, allowing enough room to sit comfortably and remove the tank from its storage space.
We’d also think carefully about where you’ll use it and how you’ll secure it while driving. A portable loo makes overnight stops much easier, but you still need privacy, somewhere accessible to store it and regular opportunities to empty the waste.
Simpler bucket and folding camping toilets collect waste in a lined container or bag rather than a flushable tank. These need suitable bags and an agreed disposal route, so check what facilities will accept before relying on one for a trip.
RELATED POST: Storage Ideas for Campervans You Need to Know About!
Macerating Toilets
A macerating toilet uses an electrically powered mechanism to break up waste and toilet paper before pumping it through pipework into a fixed black waste tank. This allows the tank to sit away from the toilet, which can be useful in larger motorhomes and layouts where there’s no space for a tank directly underneath.
These toilets usually have an electric flush, with water use and power requirements varying by model. Some offer different flush settings to help manage water consumption and tank capacity.
The pump and cutting mechanism add complexity, so access for maintenance is worth considering, particularly if you’re buying a used vehicle or planning your own installation. Only put human waste and suitable toilet paper into the system; wipes, sanitary products and other items can cause blockages or damage.
You’ll still need to empty the holding tank at a service point that accepts black waste from a fixed tank. Macerating the contents doesn’t make them suitable for disposal into a grey water drain.
Vacuum Flush Toilets
Vacuum flush toilets use suction to move waste from the bowl through pipework into a fixed black waste tank. You’re more likely to find one in a larger motorhome, boat or expedition vehicle than a typical UK campervan.
An electrically powered pump maintains a vacuum in the system, which draws waste out of the bowl when you flush. These toilets typically use relatively little flush water, and the holding tank doesn’t need to sit directly beneath the toilet, giving more flexibility when planning the vehicle’s layout.
The installation is more involved than a cassette toilet, with a pump, valves and seals that need power and maintenance. Noise levels and pump cycles vary between systems, so it’s worth hearing one working if you’re considering having one fitted.
You’ll need to follow the manufacturer’s guidance on toilet paper, cleaning products and servicing, and empty the holding tank at a suitable black waste disposal point. If you’re buying a vehicle with a vacuum toilet, check that it holds its vacuum properly and that the components are accessible for maintenance.
Incinerating Toilets
Incinerating toilets burn human waste at a high temperature, leaving a small amount of ash in a removable container. They don’t need flush water or a conventional black waste tank, making them an option for some specialist motorhome and expedition vehicle builds.
You place a purpose-made liner in the bowl before use, then operate the mechanism that transfers it and the waste into the combustion chamber. The toilet runs an incineration cycle, with fumes discharged outside through a dedicated exhaust.
The main considerations are purchase cost, fuel or electricity consumption and installation requirements. A model designed for a house or cabin won’t necessarily suit a vehicle, and even fuel-burning versions need electricity for their controls and ventilation.
Removing the need to carry liquid toilet waste can appeal for remote travel, but you’ll need to account for fuel supplies, replacement liners and servicing. Check the manufacturer’s requirements for ventilation, clearances and use while travelling, and follow its instructions and local rules when disposing of the ash.
Using Your Motorhome Toilet
There’s an endless debate in the motorhome community about pooing in your own toilet. Of course you can; it’s designed for the job! Some people prefer to use campsite facilities when they’re available, while others are perfectly happy using their own loo for everything. We’ve always fallen into the second camp.
Urine can become particularly smelly as it breaks down, so keeping your toilet fresh isn’t simply a matter of saving number twos for the campsite facilities. Adding poo and paper does fill the cassette more quickly, though, which is worth bearing in mind when you’re planning a few nights away from services.
Opening the Blade and Flushing
One of the first questions new motorhomers ask is when to open the blade, the sliding flap between the bowl and the cassette. The recommended sequence varies between toilets, so check your model’s instructions rather than assuming there’s one rule for every loo.
A little water in the bowl before use can help keep things clean, if your model allows it. Afterwards, use enough flush water to clear the bowl without unnecessarily filling the cassette. A small toilet brush suitable for the bowl’s surface is useful for anything the flush leaves behind.
Don’t force the blade lever if it feels stiff, and always close the blade fully before removing the cassette. If you’re travelling at altitude or in hot weather, follow your manufacturer’s guidance on releasing any pressure in the tank to avoid an unpleasant splash.
Motorhome Toilet Chemicals and Additives
Cassette and portable flushing toilets commonly use a waste tank additive to help control smells and break down waste and toilet paper. If you have a suitable extraction system such as SOG, you can operate without these additives, following the system’s instructions.
You’ll often see products described by colour, although these aren’t universal standards, so always read the label:
Follow the dosage on the bottle or sachet, including any water needed to prepare an empty cassette. Adding extra won’t necessarily improve performance, and the interval between treatments can vary with the product and temperature.
A green label doesn’t mean you can empty toilet waste anywhere, and chemical-free waste still needs an appropriate disposal point.
Some motorhomers use washing liquids or laundry capsules instead of toilet additives. We’ve never tried this, and would stick to products approved for your toilet rather than assume a household detergent is suitable for its seals and working parts.
What Toilet Paper Should You Use?
We used ordinary, non-quilted toilet paper in our cassette toilets without problems. Specialist quick-dissolving paper is another option, particularly if you’ve had trouble emptying the tank, but check your toilet manufacturer’s recommendations.
Use sensible amounts, as large wads of paper take up capacity and can make emptying more difficult. If you prefer to collect used paper separately, keep it in a lined, lidded bin and dispose of it appropriately.
Never put wet wipes, sanitary products, kitchen roll or cleaning cloths into the toilet, including wipes labelled flushable. Disposable bowl liners and waste bags must not be flushed into the cassette or down a normal toilet; their disposal depends on the product and local waste arrangements.
Making Your Cassette Last Longer
For a couple using the toilet for everything, emptying every two or three days is a useful starting estimate, although your tank size, flushing habits and the weather will affect this.
When we’re staying away from services, we keep an eye on capacity and plan an emptying stop before it becomes urgent. Using campsite toilets when convenient and avoiding unnecessarily long flushes can help, while a compatible spare cassette gives you additional capacity if you have somewhere suitable to secure it.
Check your tank indicator rather than relying on a particular warning colour, as displays vary between models. Empty before the tank reaches its limit, and remember that a full cassette can be surprisingly heavy when you have to carry it across a campsite.
Cleaning Your Motorhome Toilet
When we’re travelling, we give the toilet a quick clean every day, which is much easier than leaving things to build up. A regular rinse of the cassette after emptying, an occasional deeper clean and a little attention to the seals will also help keep everything working smoothly.
Cleaning the Bowl and Outside Surfaces
Use a cleaner suitable for your toilet’s materials, particularly if it has a plastic bowl. Household toilet cleaners, abrasive powders and scouring pads can damage the surface, making it harder to keep clean afterwards.
Clean around the seat, lid, hinges and blade control with a soft cloth, following the product’s instructions. Use separate cleaning cloths for the toilet and the rest of your bathroom.
Avoid household bleach, strong descalers and other harsh cleaners unless your toilet manufacturer specifically permits them. We’ve tried various cleaning shortcuts over the years, but would now stick with compatible products rather than risk damaging seals or working parts.
Deep Cleaning the Cassette
Rinsing after emptying helps remove loose waste, but deposits can still build up inside the cassette and around its moving parts. Periodically use a purpose-made cassette tank cleaner, following its dilution, soaking and disposal instructions.
You don’t need to put your hand inside the tank for routine cleaning. If deposits remain around accessible parts, follow the toilet’s maintenance instructions and use suitable tools without forcing the blade or damaging the level indicator.
Never mix cleaning products or add a cleaner to a cassette that still contains another treatment unless the manufacturer explicitly allows it. Empty and rinse the tank first, and dispose of the cleaning solution at an appropriate facility.
Looking After Seals and Moving Parts
The blade seal helps keep the cassette watertight and limits smells entering the bathroom. Keep it free from paper and deposits, and use the seal lubricant recommended for your toilet when required.
If the blade becomes difficult to operate, check for trapped paper or a dirty seal before forcing the lever. Persistent stiffness, leaks or a bowl that no longer holds water can indicate that servicing or a replacement seal is needed.
Cleaning Separating Toilets
Separating toilets need a different routine, so follow the instructions for your particular model. Keep the urine outlet clear, clean the bowl with an approved product and avoid allowing cleaning water to soak the solids container.
For our Separett Tiny, looking after the urine collection system and keeping the ventilation working are important parts of the routine. Other designs have different requirements, particularly those with mixing mechanisms or added cover material, so cassette-cleaning advice shouldn’t automatically be applied to them.
RELATED POST: Help …My Camper Smells Bad
Disposing of Black Waste
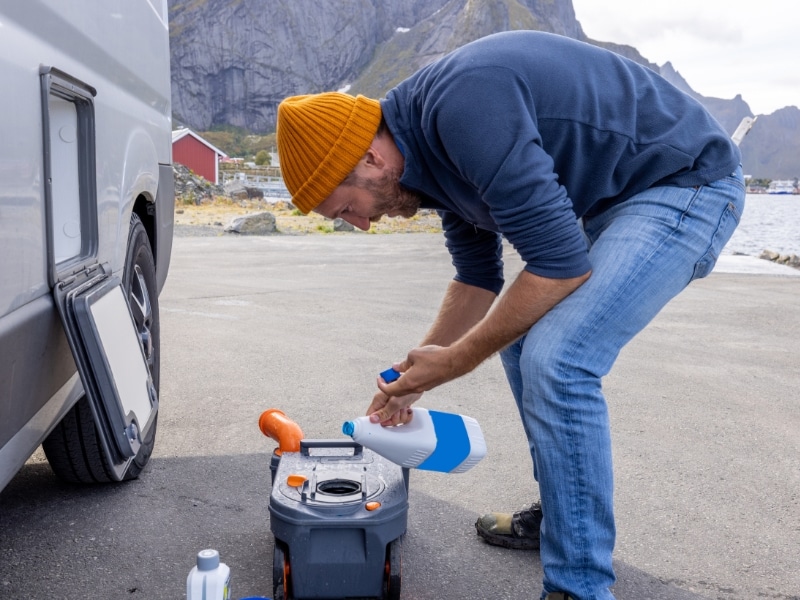
Emptying the toilet is rarely anyone’s favourite motorhome job, but it soon becomes part of the routine. We’ve used everything from spotless service areas with automatic cassette-cleaning machines to basic disposal points where you’re very glad you brought gloves!
Black waste is toilet waste, and it needs a disposal facility that accepts it. A drive-over grey water drain isn’t automatically suitable, even if there’s a hose nearby or you’ve seen someone else emptying their toilet there.
You can find service points using Park4Night, campsite listings and motorhome stopover directories. Check the facilities listed and any recent reviews, particularly if you need access for a fixed black tank rather than a removable cassette.
Emptying Cassette and Portable Toilets
Empty before the tank reaches capacity, and allow a little extra margin before a long drive or a stay without services. Warning lights and level indicators vary between models, so get to know yours rather than waiting for a particular colour.
- Close the toilet blade fully and make sure nobody uses the toilet while the cassette is removed. For a portable toilet, separate the waste tank from the upper section as instructed.
- Put on protective gloves, check that the emptying spout cap is secure and carry or wheel the tank to the designated disposal point.
- Position the tank securely, rotate the emptying spout and remove its cap, following your model’s instructions.
- Aim the spout into the disposal opening and pour steadily. If your cassette has an air-release button, operate it as instructed, keeping it above the liquid level to help prevent splashing.
- Use the designated cassette-rinsing tap to add a little water, replace the cap and gently move the tank around before emptying again. Repeat as needed.
- Clean up any splashes around the disposal point, secure the cap and prepare the cassette with the water and additive required for your setup.
- Refit the tank securely, remove your gloves and wash your hands thoroughly.
Keep the rinsing hose outside the cassette rather than pushing it into the spout, and never use the drinking-water tap or your fresh water filling hose for this job. If the disposal point is blocked or won’t accept the contents, stop and report it rather than trying to force waste through the opening.
Emptying a Fixed Black Waste Tank
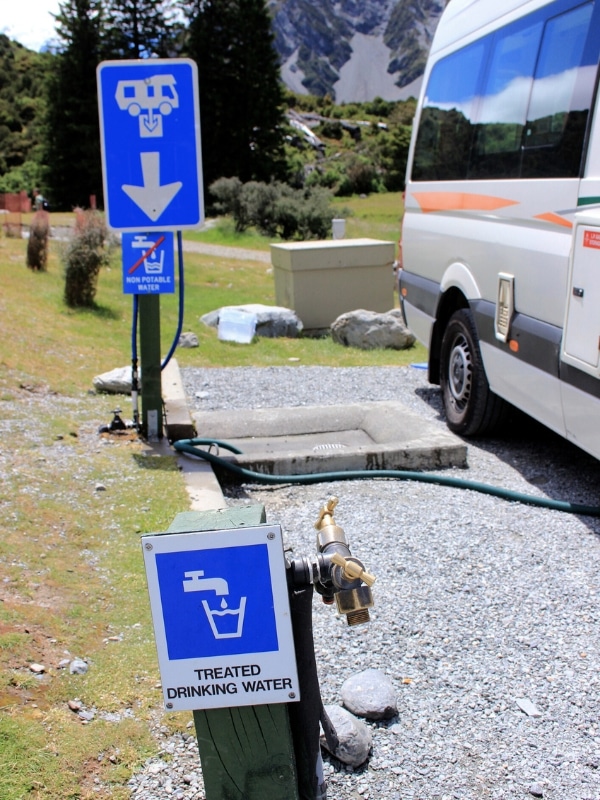
Fixed tanks need a service point designed to accept toilet waste through a sewer hose, with enough access to position your vehicle safely. Check this before arriving, as many European motorhome facilities cater primarily for cassettes.
Follow your vehicle’s instructions, but the usual process is to check that the tank valves are closed, attach the sewer hose securely and position its other end in the approved disposal inlet before opening the black tank valve.
If you have separate black and grey tanks, the usual sequence is to empty the black tank first, close its valve and then drain the grey tank through the same hose, where the facility permits both. Follow any tank-rinsing instructions carefully and use a dedicated waste-system hose for
RELATED POST: Motorhome Cleaning: The Best Methods & Products

Motorhome Toilets and Wild Camping
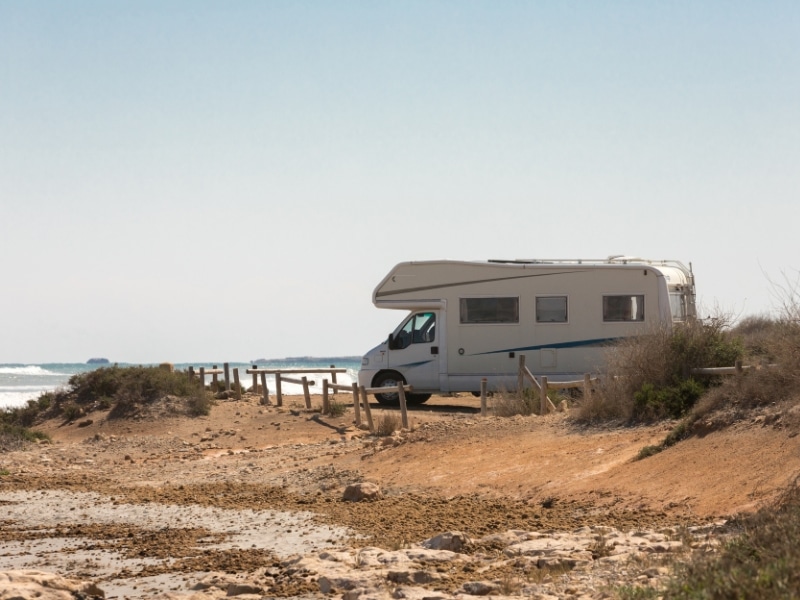
When you’re staying away from campsites, toilet capacity can determine how long you remain in one place, even when you still have plenty of fresh water and battery power. We’ve always found it easier to build service stops into our travels than wait until the cassette is full and start searching urgently.
Before heading somewhere remote, empty your toilet at a suitable facility and check where you can next dispose of waste. Some service points close seasonally, charge separately for access or are reserved for overnight guests, so it’s worth checking before making a detour.
Making the Most of Your Capacity
Use enough water to keep the toilet working properly, but avoid running the flush longer than necessary. A small amount of water in the bowl before use, where your model allows it, and a suitable toilet brush can help keep things clean without repeatedly flushing.
A compatible spare cassette can extend the time between service stops, provided you have somewhere secure to carry it upright with its openings sealed. Remember to allow for the weight of the full tank in your payload.
Hot weather can make smells develop more quickly, so you may want to empty before reaching capacity. Follow your additive’s instructions for treatment intervals and keep ventilation systems maintained.
Emptying Away from Campsites
Being chemical-free doesn’t make toilet waste suitable for pouring onto the ground, into a watercourse or down a roadside drain. This applies to cassette contents and urine collected by separating toilets.
Don’t assume a public toilet can be used for cassette emptying either. Check with the operator, as access, plumbing and cleaning arrangements may make it unsuitable. At home, disposal into a toilet connected to the foul sewer may be an option, provided your waste treatment is compatible; properties with septic tanks need particular care.
With a separating toilet, plan for urine disposal as well as solids. Follow the local authority or site operator’s requirements for bagged human waste, and don’t put it into recycling, food-waste collections or shared compost bins.
For us, changing to a Separett Tiny made remote travel easier because we no longer use flush water and can go longer between solid-waste empties. We still have to manage the urine and find appropriate disposal facilities, so it remains part of our planning.
Having a usable toilet on board helps us leave the places we visit as we found them. If yours is nearly full and there’s no suitable disposal point nearby, it’s time to move on to services.
More Motorhome Tips to Explore

Scotland Motorhome Itinerary: The Ultimate 2–3 Week Road Trip

12 Best Places to Spend Winter in a Motorhome in Europe

Gap Year for Over 50s: How to Take Time Out and Make It Count
Motorhoming in Spain: Your Complete Touring Guide

Spain Motorhome Itinerary: The Ultimate 6-Week Road Trip
Motorhome Water Systems: Fresh Water, Waste Tanks and Maintenance
Love it? Pin it!